Outdoor Christmas Display Planning Guide 2026
How to plan a whole-yard outdoor Christmas display in 2026 — mapping zones, budgeting power and circuits, sequencing the install, and safely mixing permanent lights, string lights, projectors, and inflatables. Plan in summer, install before the cold.
This article contains affiliate links. If you purchase through these links, we may earn a commission at no extra cost to you. Learn more.
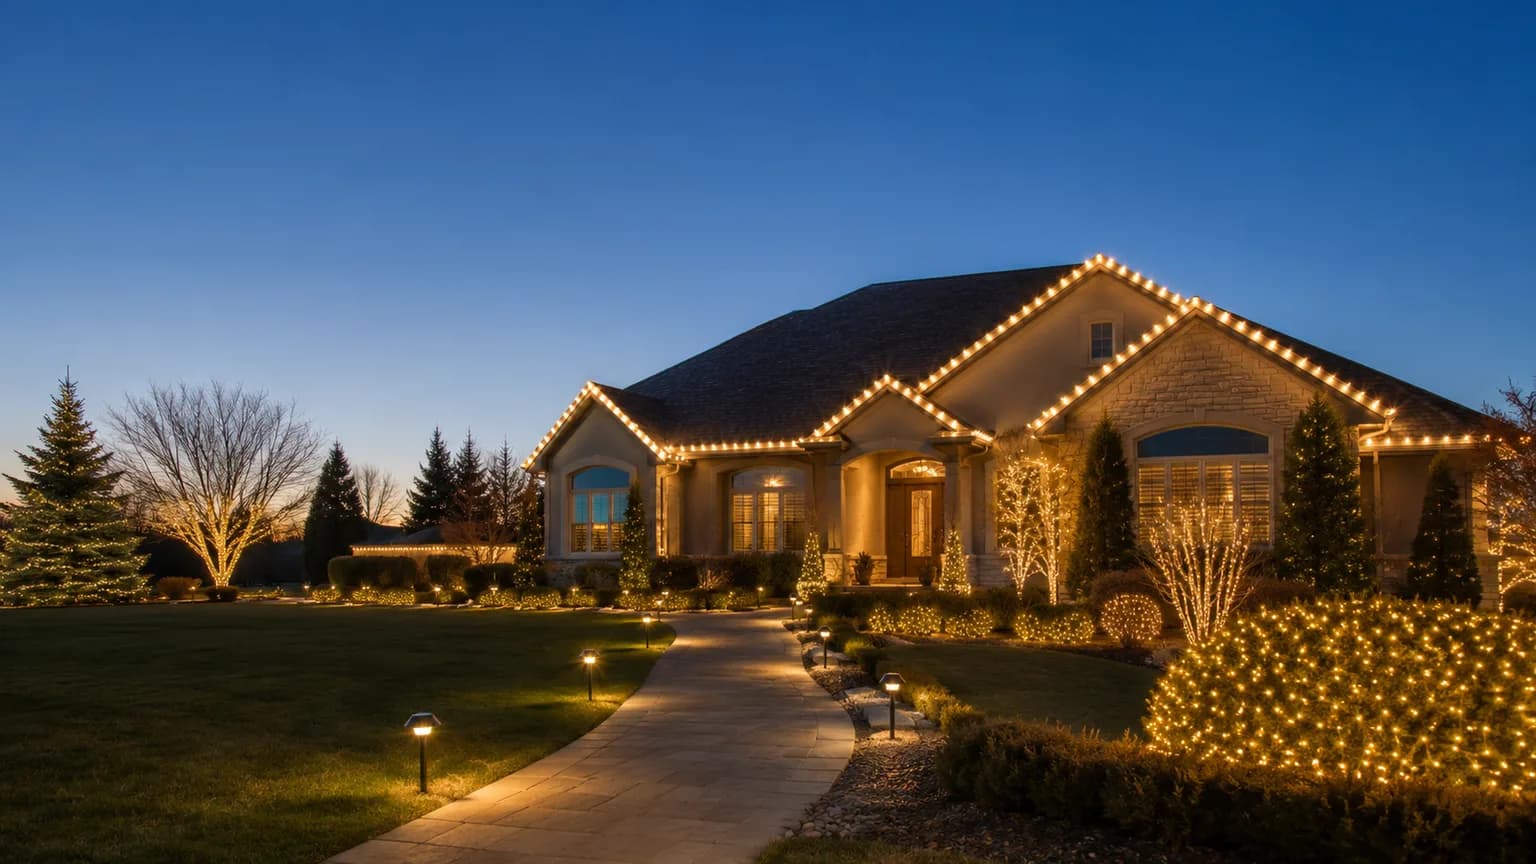
A great outdoor Christmas display looks effortless from the street, but the ones that actually work — the ones that don't trip a breaker on the first cold night, leave extension cords snaking across a walkway, or end with a ladder trip in freezing weather — are planned months before a single light goes up. Summer is when that planning happens. The install itself is a warm-weather job, but the thinking behind it, the measuring and the math and the sequencing, is best done now, with time to order what's missing and none of the December pressure.
This is a process guide, not a product roundup. It won't hand you a list of the ten lights to buy; instead it walks through the decisions that a good display rests on — how to divide the yard into zones, how to budget the electrical load so the whole thing actually turns on at once, what order to install in so each step doesn't undo the last, and how to combine different kinds of decoration (permanent eave lights, seasonal string lights, projectors, inflatables, and landscape lighting) into one display that reads as intentional rather than piled-on. The specific products live in the dedicated roundups this guide links to along the way.
The payoff for planning in summer is real. Warm weather is when adhesive clips seat properly, when ladder work on a dry roof is safe, and when a permanent lighting system can be installed once and left up for good. Plan the display now, order any gaps in the off-season, and the actual install becomes a relaxed afternoon in October rather than a cold, rushed scramble the week before the neighborhood lights up.
Step 1: Map Your Yard Into Zones
Every good display starts as a rough map, not a shopping cart. Walk the yard and the front of the house and break it into distinct lighting zones, because each zone has different needs, different mounting methods, and a different share of the power budget. Thinking in zones stops a display from becoming a random scatter of lights and turns it into a composition with a clear focal point and supporting layers.
The common zones for most homes are: the rooflines and eaves (the architectural outline of the house, best suited to permanent lights or roofline string lights), the windows and doorways (framing and wreaths), the trees and shrubs (wrapped trunks, net lights, or lit branches), the walkway and driveway edges (pathway markers and stakes), the lawn and garden beds (inflatables, light-up figures, and projector coverage), and the porch or entry as the up-close welcome zone. Not every home uses every zone, and a strong display often deliberately leaves some dark to keep the eye on a chosen focal point.
Sketch the zones on paper or a phone photo of the house and note, for each, roughly what goes there and how it mounts. This map becomes the backbone of everything that follows — the power budget, the shopping list, and the install order all flow from it. It also reveals early where two ideas would fight: a projector wash and a densely lit tree in the same sightline, for instance, tend to cancel each other out.
Step 2: Measure Before You Buy
The single most common outdoor-lighting mistake is buying by guesswork and ending up short — or with far too much. Before ordering anything, measure each zone. Walk the roofline perimeter with a tape or a measuring wheel and record the total footage, including the runs up hips and valleys; measure the height and spread of each tree or shrub you plan to wrap; and note the length of each pathway and garden edge. Add roughly ten percent to every run for corners, drops, and routing slack.
These numbers feed directly into the count. Our Christmas light calculator guide turns roofline footage and tree dimensions into an actual number of lights and strands, which is the figure to shop against — not a vague sense of "a few boxes." Measuring also tells you where a permanent roofline system makes sense (a fixed, repeatable perimeter you light every year) versus where seasonal string lights are the flexible choice.
Getting the measurements right in summer is what makes early buying pay off. With the footage in hand, you can order the exact lengths during the off-season, when selection is widest, rather than discovering on a December afternoon that you're two strands short and the store is sold out.
Step 3: Budget the Power Load
This is the step most displays skip, and it's the one that causes the most grief — the breaker that trips every evening, the display that only half-lights, the daisy-chained cords that run warm. Every light, inflatable, and projector draws power, and a standard household circuit can only supply so much before it trips. Planning the electrical load on paper is what separates a display that turns on reliably from one that fights you all season.
The core idea is simple: a typical 15-amp household circuit at 120 volts can safely carry roughly 1,440 watts on a continuous load (80% of its 1,800-watt maximum), and a 20-amp circuit correspondingly more. Add up the wattage of everything you plan to plug into a given outlet or circuit — check the label or box for each item's watts, remembering that LED lights draw a small fraction of what old incandescent strands did, while inflatables and projectors with motors and fans draw more. Keep each circuit's total comfortably under that continuous limit, and spread the display across multiple outdoor circuits rather than overloading one.
Two practical rules follow. First, favor LEDs everywhere you can — their low draw is what lets a large display run on a modest number of circuits. Second, plan the outlets before you plan the lights: know which exterior outlets exist, which interior circuit each is on, and whether a heavy zone (a big inflatable, a bank of projectors) needs its own dedicated outlet. The power, timers, and safety planning guide covers the outlet-and-circuit side in depth, including timers and weatherproofing.
Step 4: Choose and Combine Your Elements
With zones mapped, footage measured, and power budgeted, the display's ingredients come into focus. The art here is combining different kinds of decoration so they complement rather than compete. A display that mixes elements thoughtfully reads as rich and layered; one that piles everything everywhere reads as noise.
Permanent roofline lights are the architectural foundation — a fixed outline of the house that goes up once and stays, controllable by app for color and scenes year-round. They're the anchor of a modern display; see the best permanent outdoor Christmas lights roundup and, if you're still deciding, are permanent Christmas lights worth it.
Seasonal string lights are the flexible layer — wrapping trees and shrubs, framing windows, and edging the porch, easily changed year to year. See the best Christmas string lights and LED displays.
Projectors cover large surfaces — a whole facade or lawn — with moving patterns from a single device, doing a lot of visual work for little effort and low mounting. Used as a wash on an otherwise plain wall they shine; layered over an already-busy zone they muddy it. See the best Christmas projector lights.
Inflatables and lawn figures are the focal-point characters — the giant snowman or the scene the kids run to. One or two well-placed inflatables anchor a lawn zone; a dozen crowd it. See the best Christmas inflatables.
The rule that ties them together: pick one focal point per sightline and let the other elements support it. A projector-washed facade or a densely lit feature tree, not both in the same view. Coordinate color temperature too — mixing warm white and cool white at random looks accidental, while committing to one (or a deliberate contrast) looks designed.
Step 5: Sequence the Install
The order you install in matters as much as what you install, because some steps block others. The efficient sequence works from the top down and from the house outward, so no later step means undoing an earlier one.
A sensible order: first, the roofline and eaves — the highest, most ladder-intensive work, done first while you're fresh and the roof is dry, and while nothing below is in the way of the ladder. Second, windows, doorways, and the porch — the mid-height framing. Third, trees and shrubs — wrapping trunks and branches, which is ground-level and flexible (the tree and column wrapping guide covers spacing and footage math). Fourth, pathway and garden-edge markers. Fifth, inflatables and lawn figures, placed last so they're not in the way of the earlier work and their stakes don't interfere with cords already run. Finally, the power routing and timer — connect the zones to outlets, tuck and secure the extension cords along edges rather than across walkways, and set the timer.
Doing the high, dangerous work first and in warm, dry weather is the safety heart of this sequence. It's also why summer planning matters: if the roofline calls for a permanent system, installing it on a dry autumn afternoon — once, for good — takes the hardest and riskiest part of the display off the annual to-do list entirely.
Step 6: Plan for Control, Weather, and Safety
A display that has to be switched on and off by hand at an outdoor outlet gets used less and risks being left on. Plan the control layer from the start: an outdoor-rated timer or smart plug turns the whole display on at dusk and off at bedtime automatically, and permanent systems bring app scheduling built in. Group the display so a single timer or plug controls a whole zone rather than wiring each strand separately.
Weather and safety are non-negotiable outdoors. Use only outdoor-rated lights, cords, and timers (look for a rating on the packaging); plug outdoor circuits into GFCI-protected outlets; keep all connections up off the ground and out of standing water, tucking cord junctions under eaves or into weatherproof covers; and never overload a cord or run undersized cords for a heavy load. The power, timers, and safety planning guide walks through the outlet, timer, and weatherproofing choices in detail, and for the roofline technique specifically, the how to hang Christmas lights on a roof and gutters guide covers no-drill clip methods and ladder safety — and for brick, stucco, and siding walls, the no-nails hanging guide does the same. For the roofline-drop look, see the icicle lights roundup; for bush and hedge zones, net lights cover them fastest.
Plan Now, Install Later
The whole argument for planning in summer comes down to this: the display you plan calmly in July is the display that actually goes up smoothly in October and turns on reliably all season. Mapping the zones, measuring the runs, budgeting the power, and sequencing the install are all free to do now, and they turn a stressful December scramble into a relaxed afternoon. For the timing of when to buy each piece, see the when to buy Christmas decorations timeline, and to keep the whole project on budget, the Christmas savings and budget plan. Indoors, the Christmas decor theme and color planning guide is the companion to this outdoor plan.
Last updated: July 2026. Prices and availability may vary on Amazon — check current details via the links above.
Frequently Asked Questions
When should I plan and install an outdoor Christmas display?
Plan in summer and install in autumn, before the cold. The planning — mapping zones, measuring runs, budgeting power, sequencing the install — is best done now, with time to order any gaps at off-season prices. The install itself is a warm-weather job: adhesive clips seat properly in the heat, ladder work is safer on a dry roof, and a permanent system can go up once and stay. Aim to have everything mounted on a dry October afternoon rather than a freezing December one.
How do I avoid tripping a breaker with my Christmas lights?
Budget the electrical load before you plug anything in. A standard 15-amp household circuit safely carries about 1,440 watts continuously, so add up the wattage of everything on each outlet and keep the total comfortably under that, spreading the display across multiple circuits. Favor LED lights, which draw a small fraction of what incandescent strands did, and give heavy items like inflatables or projector banks their own outlet. The power and safety planning guide covers this in detail.
How do I combine different types of Christmas decorations without it looking cluttered?
Pick one focal point per sightline and let everything else support it — a projector-washed facade or a densely lit feature tree, not both in the same view. Use permanent roofline lights as the architectural anchor, string lights as the flexible wrapping layer, projectors as a wash on plain surfaces, and one or two inflatables as lawn focal points. Coordinate color temperature rather than mixing warm and cool white at random, and deliberately leave some zones dark to keep the eye where you want it.
What order should I install outdoor Christmas lights in?
Work top-down and house-outward so no step undoes another: roofline and eaves first (the highest, most ladder-intensive work, done while fresh and dry), then windows and porch, then trees and shrubs, then pathway markers, then inflatables, and finally the power routing and timer. Doing the high, risky work first in warm dry weather is the safety core of the sequence.
Do I need permanent lights, or are string lights enough?
It depends on the zone. Permanent roofline lights are worth it for the fixed architectural outline you light every year — they go up once and bring year-round app control — while seasonal string lights are the flexible choice for trees, shrubs, and framing that you may change annually. Many displays use both: permanent lights as the anchor and string lights as the layer. If you're weighing the permanent investment, start with the "are permanent Christmas lights worth it" guide.
How many lights do I actually need for my house?
Measure first: walk the roofline perimeter and record the footage, measure each tree and shrub you'll wrap, and note pathway lengths, adding about ten percent for corners and slack. Those measurements turn into an actual light count — the Christmas light calculator guide converts roofline footage and tree dimensions into the number of strands to buy, so you order the exact amount during the off-season rather than coming up short in December.
Get our Christmas gear picks
Holiday deal roundups and updates when our top picks change.
No spam, ever. Unsubscribe anytime.
Sources & Methodology
Methodology: ChristmasGearHQ guides are researched on an expert-verification model. Specifications, dimensions and capability claims are taken from the manufacturer's own published material and, where available, independent published reviews, and are attributed in the text to the source that published them. Where two sources disagree, we say so and name both rather than picking one. We do not make first-person hands-on testing claims.
Prices, sellers and availability are read from the live product page and move on their own schedule — confirm the current figure through the links above before buying. Edited by Nicholas Miles, Chief Editor. Corrections: contact us.
More Guides
- Christmas LightsBest Giant Lighted Outdoor Christmas Trees 2026: 6 to 20 Foot Cone, Flagpole, Spiral and 3D Picks
- Christmas LightsJellyfish vs Trimlight vs Gemstone - What Permanent Christmas Lights Cost in 2026
- Christmas LightsBest Smart Outdoor Plugs & Timer Zone Kits for Christmas Lights 2026
- Christmas LightsChristmas Light Power, Mounting & Cable Accessories 2026