How to Hang Christmas Lights on a Roof & Gutters (2026 Guide)
How to hang Christmas lights on a roof and gutters the safe way — no-drill clip types, ladder safety rules, and a step-by-step install for 2026.
This article contains affiliate links. If you purchase through these links, we may earn a commission at no extra cost to you. Learn more.
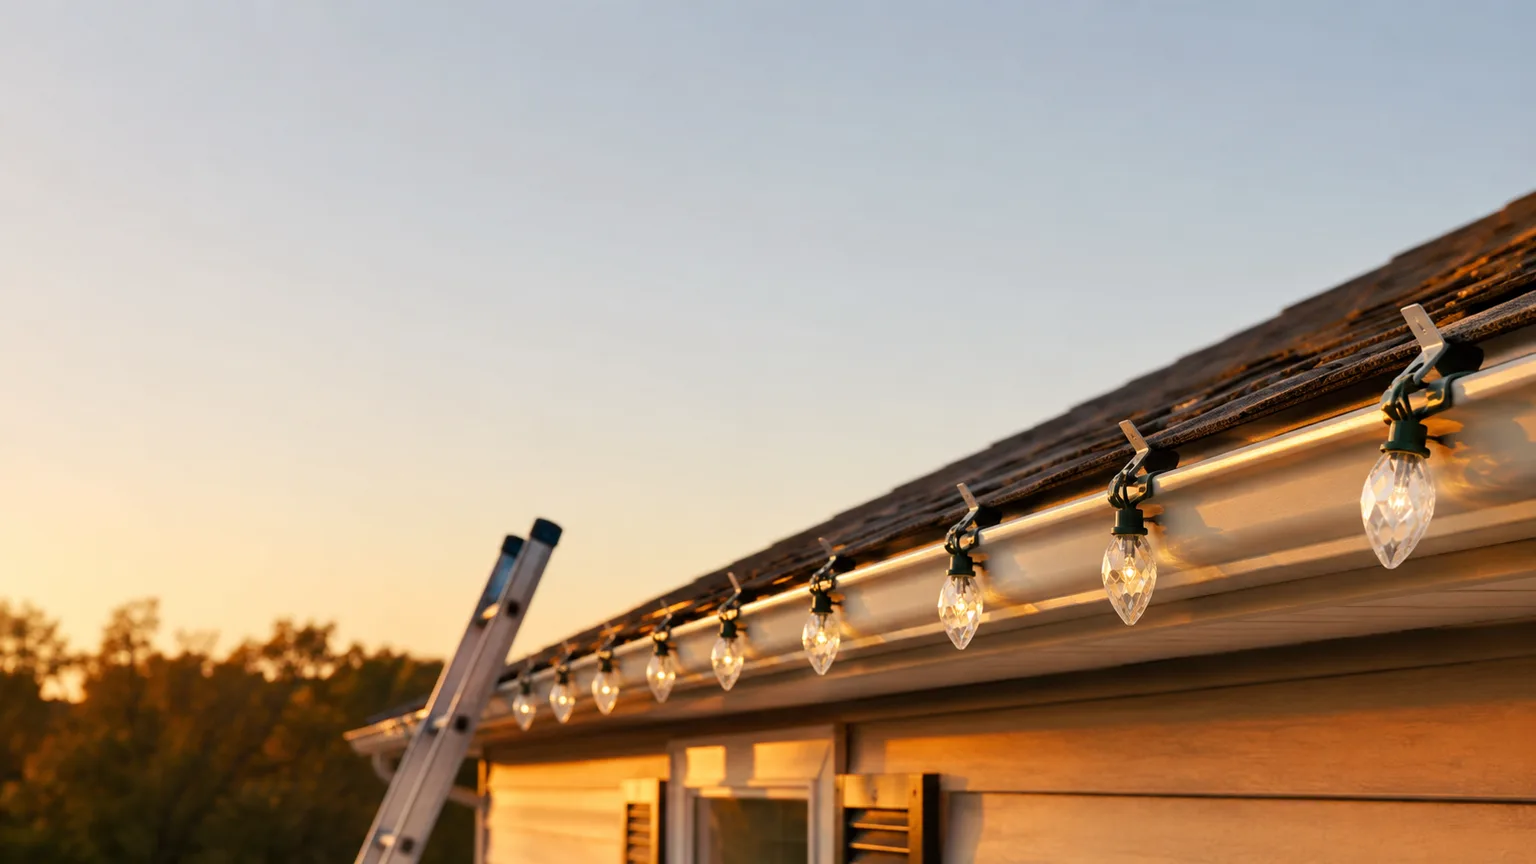
| Roofline Surface | Clip Type | How It Attaches |
|---|---|---|
| Metal or vinyl gutter | Gutter clip | Hooks over the gutter lip and grips with spring tension — no adhesive or hardware |
| Asphalt shingle edge | Shingle/shingle-tab clip | Slides under the shingle tab and clips the light socket in place using the shingle's own weight for grip |
| Fascia board / drip edge (no gutter) | All-in-one or fascia clip | Clamps onto the thin edge of the drip edge or fascia board with a spring-loaded jaw |
| Brick or mortar joint | Brick clip | Wedges into the mortar gap between bricks — no adhesive, no drilling into the brick face |
| Roof peak / soffit with no clean edge | Adhesive-backed clip | Sticks to a clean, dry surface; bonds best in warm weather, which is why summer install timing matters |
A roofline traced in lights is the single biggest visual upgrade a holiday display can make, and it's also the part of the project homeowners put off the longest. The idea of climbing a ladder and working along the edge of a roof sounds like a job for a professional crew. In practice, it's closer to a half-day project than a specialty trade — the modern generation of no-drill clips does the hard work of gripping the gutter, shingle, or fascia, and the actual "install" is mostly walking a ladder along the house and snapping lights into place a few feet at a time.
What trips people up isn't the lights, it's the timing. Waiting until a cold, wet weekend in late November means rushing a ladder job in bad conditions, fighting stiff clips, and working against the sunset instead of a comfortable afternoon. Warm, dry July weather is genuinely the better window for this work: adhesive-backed clips seat properly in the heat, gutters and shingles are dry and grippy underfoot conditions on the ladder are safer, and there's zero pressure to finish before dark. Getting the roofline done now means it's simply ready to switch on come December.
This guide walks through the entire process — picking clips that don't require drilling into anything, measuring and planning the run before a ladder ever comes out, the safety rules that matter most on a roofline job, and the actual step-by-step hang. For the bigger-picture plan (yard layout, power routing, timing the whole display), start with the outdoor Christmas display planning guide, which this article fits into as the roofline-specific chapter. For the other surfaces, hanging lights on brick, stucco, and siding without nails covers walls, and wrapping outdoor trees and columns covers trunks, posts, and railings.
What You'll Need
A roofline light job doesn't require a long shopping list, but having the right pieces on hand before climbing anything makes the job faster and safer.
- Lights sized to the roofline. Know the total footage before buying — the Christmas lights calculator guide walks through measuring a house accurately. For general string options, see the best Christmas string lights guide.
- The correct clip type for the surface — gutter, shingle, or brick (covered in detail below).
- A sturdy, properly sized ladder rated for the job, with slip-resistant feet.
- A light-hanging pole (an extendable pole with a hook or clip-holder tip) to place clips from lower rungs without overreaching.
- An outdoor-rated extension cord to bridge from the control point to a GFCI outlet.
- An outdoor timer to automate on/off without manual switching.
- Work gloves for grip and to protect hands from sharp gutter edges and shingle grit.
Most of these clip and cord items are inexpensive enough to buy in bulk; a set of all-purpose light clips covers gutters and shingles both, so one bag often handles the whole house.
Choosing the Right Clips (No Drilling Required)
The entire premise of a DIY roofline install is that nothing gets drilled, screwed, or nailed into the house. Clips are designed to grip an existing edge — a gutter lip, a shingle tab, a brick mortar line — using spring tension or a snug friction fit. Using the wrong clip for the surface is the most common install mistake: a gutter clip forced onto a shingle edge can crack it, and a shingle clip on a gutter often won't hold tension.
A single roofline often needs two clip types — gutter clips along the horizontal run and shingle or brick clips wherever the gutter stops, like a peak or an entryway overhang. Buying an assorted multi-surface pack avoids a mid-project trip back to the store.
Measure & Plan Before You Climb
The planning happens entirely on the ground, and it's the step that prevents wasted ladder trips later. Start by walking the perimeter of the roofline that will get lights and measuring the total run — the lights calculator guide breaks down exactly how to convert a house's dimensions into a footage number, including extra length for corners and drops.
Once the footage is known, sketch the path mentally or on paper: where the strand starts (nearest the power source), which direction it travels, where it turns corners, and where it ends or connects to a second strand. Note anything that will change the plan — a chimney to route around, a section without a gutter, a peak that needs the pole to reach.
Before carrying anything up a ladder, lay the full strand out on the driveway or lawn and plug it in. This catches dead bulbs, damaged sockets, or a strand that's shorter than expected while it's still easy to swap out — nobody wants to discover a burned-out section forty feet up a roofline.
Ladder Safety (Read This First)
Ladder mishandling causes far more injuries during holiday light season than the lights themselves, so this section deserves a slow read before anything else in this guide gets put into practice.
- Use the right height ladder. The ladder should let hands and shoulders stay below the top few rungs while working — never stand on the top rung or the very top of a stepladder.
- Follow the 4-to-1 angle rule. For an extension ladder, the base should sit one foot away from the wall for every four feet of height to the point of contact. Too steep and it can tip backward; too shallow and the base can slide out.
- Keep three points of contact at all times. Two feet and one hand — or two hands and one foot — should stay on the ladder every moment. That's the main reason a light-hanging pole is worth owning: it lets clips get placed a few feet higher or to the side without ever leaning off the rails.
- Never overreach. If a clip placement is out of comfortable arm's reach, climb down and move the ladder rather than stretching sideways. A good rule of thumb: keep the belt buckle between the ladder's side rails at all times.
- Move the ladder instead of leaning it. It takes thirty extra seconds and it's the single biggest injury preventer on this whole list.
- Work with a spotter. A second person to hold or steady the base, hand up materials, and watch for slipping makes the job meaningfully safer, especially on multi-story sections.
- Skip the job in bad conditions. Wind, rain, dew, or ice on a roofline or ladder rungs turns an easy task into a genuine hazard — this is precisely why doing the install during a dry, calm July stretch beats squeezing it in during unpredictable late-fall weather.
None of this is overly cautious for effect — these are the same fundamentals covered in the power, timers, and safety planning guide, which is worth reading in full alongside this section.
Step-by-Step: Hanging the Lights
- Start near the power source. Begin the strand at the end closest to the outdoor outlet, so the plug end naturally lands where it needs to connect without extra cord doubled back along the roofline.
- Set the ladder using the 4-to-1 rule at the starting corner, confirm it's on stable, level ground, and have a spotter hold the base if one is available.
- Clip the first few feet at the drip edge or gutter lip, keeping bulbs facing outward and evenly spaced — most clips have a built-in spacing guide, but eyeballing consistent gaps (commonly 8–12 inches) keeps the line looking uniform from the street.
- Use the light-hanging pole to extend reach for clips that sit above or beside a comfortable standing position, rather than leaning or overreaching from the ladder.
- Work in short sections, moving the ladder every 4–6 feet instead of trying to cover a long stretch from one position.
- Route around obstacles deliberately — chimneys, vents, and dormers usually need a slight detour or a short jump using an extension connector rather than stretching the main strand.
- Secure the run at corners with an extra clip or two, since corners take the most wind stress over a full season.
- Check tension periodically — the strand should sit snug against the edge without hanging loose or being pulled so tight it strains the sockets.
Powering & Timing the Display
Once the strand is hung, the electrical side matters as much as the mounting. Plug into a GFCI-protected outdoor outlet — this is a non-negotiable for any exterior lighting, since it cuts power instantly if moisture causes a short. Route any extension cord connections up off the ground where possible, and wrap exposed plug connections in electrical tape or a weatherproof cover to keep out rain and snow.
An outdoor timer removes the daily hassle of switching the display on and off and is one of the cheapest upgrades available for the setup. For the full breakdown of amp loads, extension cord ratings, GFCI placement, and timer scheduling, the power, timers, and safety planning guide covers it end to end.
Take-Down & Storage — or Skip It Entirely
When the season ends, take-down follows the same safety rules as the install — same ladder angle, same three points of contact, same avoidance of wind or ice on the rungs. Unclip in the reverse order of installation, coil each strand loosely (a wide loop rather than a tight wrap prevents kinks and stress on the wire), and store in a bin away from moisture and rodents.
Worth being honest about here: the annual climb up and down is the part of a roofline display most homeowners like least, and it's also entirely optional. A permanent installation mounts a channel system once and stays up year-round, switching between holiday colors and everyday warm white with a phone app instead of a ladder trip twice a year. For anyone who dreads this cycle every season, the best permanent outdoor Christmas lights guide is worth a look — install once in a dry summer stretch like this one, and the roofline job is done for good.
Before the ladder comes out, size the order with the how many Christmas lights do I need calculator; and if roofline work is turning into a paid side gig, the Christmas light installation business starter guide covers the pro-grade kit.
Last updated: July 2026. Prices and availability may vary on Amazon — check current details via the links above.
Frequently Asked Questions
Can you hang lights without a ladder?
For single-story homes, a light-hanging pole alone can sometimes reach the roofline from ground level, especially on a porch or low eave. For anything above a single story, a ladder is necessary — there's no safe substitute for reaching a second-story gutter or peak.
Do clips damage gutters or shingles?
Properly sized clips are designed not to damage either surface — gutter clips use spring tension rather than force, and shingle clips slide under the tab without lifting or cracking it. Damage typically happens when the wrong clip type is forced onto a surface it wasn't designed for, which is why matching clip to surface matters.
How do you hang lights on a two-story house?
The process is the same, but every safety margin should get tighter: a taller, properly rated extension ladder, a spotter is close to mandatory rather than optional, and a light-hanging pole becomes essential for reaching peaks and upper sections without repositioning constantly. Many homeowners choose to do only the accessible ground-floor and single-story sections themselves and hire help for a steep or very tall second story.
Do lights work with gutter guards installed?
Most gutter guard styles still leave enough of a lip exposed for a standard gutter clip to grip. Mesh or fine-screen guards can make the edge harder to access; in that case, a fascia or drip-edge clip that mounts just below the guard is usually the better fit.
How do you keep lights from falling off during winter storms?
Even spacing and a properly seated clip at every few feet is the main defense — a run held up by only two or three clips is far more likely to sag or drop in wind. Adding an extra clip at every corner and at any low point in the strand reduces stress on the rest of the run.
What's the best time of year to install roofline lights?
Warm, dry weather is best for both safety and clip performance — adhesive-backed clips bond more reliably in heat, and working a ladder on a dry roofline in July or August is far safer than doing the same job on a cold, wet, or icy day in late November. That's the core reason to treat this as a summer project rather than a last-minute scramble.
Can the same clips be reused year after year?
Yes — that's the main advantage of clip-based systems over adhesive hooks or tape. As long as the clips aren't cracked or the spring tension hasn't gone slack, they can stay on the roofline (or come off and get reused) season after season, which is part of why buying a full multi-surface set once pays off over several years.
How do you attach Christmas lights to shingles?
With shingle-tab clips only — they slide under the shingle tab and grip without lifting or cracking it, then come off clean at takedown. Never staple, nail, or screw into shingles: every puncture is a potential leak point. If the home has a drip edge or gutter, clip there instead and skip the shingles entirely; shingle clips are for roof edges where neither of those mounting lips is available.
How do you install Christmas lights on a roofline, step by step?
Measure the roofline and test the strand on the ground first. Start at the end nearest the outdoor outlet, set the ladder at a 4-to-1 angle, and clip the strand at the drip edge or gutter lip with bulbs facing outward and spacing kept even — commonly 8 to 12 inches between clips. Use a light-hanging pole to reach beyond arm's length, move the ladder every 4 to 6 feet rather than overreaching, add an extra clip at each corner, and finish by plugging into a GFCI-protected outdoor outlet, ideally on a timer.
Get our Christmas gear picks
Holiday deal roundups and updates when our top picks change.
No spam, ever. Unsubscribe anytime.
Sources & Methodology
Methodology: ChristmasGearHQ guides are researched on an expert-verification model. Specifications, dimensions and capability claims are taken from the manufacturer's own published material and, where available, independent published reviews, and are attributed in the text to the source that published them. Where two sources disagree, we say so and name both rather than picking one. We do not make first-person hands-on testing claims.
Prices, sellers and availability are read from the live product page and move on their own schedule — confirm the current figure through the links above before buying. Edited by Nicholas Miles, Chief Editor. Corrections: contact us.
More Guides
- Christmas LightsBest Giant Lighted Outdoor Christmas Trees 2026: 6 to 20 Foot Cone, Flagpole, Spiral and 3D Picks
- Christmas LightsJellyfish vs Trimlight vs Gemstone - What Permanent Christmas Lights Cost in 2026
- Christmas LightsBest Smart Outdoor Plugs & Timer Zone Kits for Christmas Lights 2026
- Christmas LightsChristmas Light Power, Mounting & Cable Accessories 2026