How to Wrap Outdoor Trees & Columns With Christmas Lights (2026 Guide)
How to wrap outdoor trees, porch columns, and railings with Christmas lights — trunk footage math, worked examples, spiral technique, and power planning for 2026.
This article contains affiliate links. If you purchase through these links, we may earn a commission at no extra cost to you. Learn more.
Quick picks from this guide
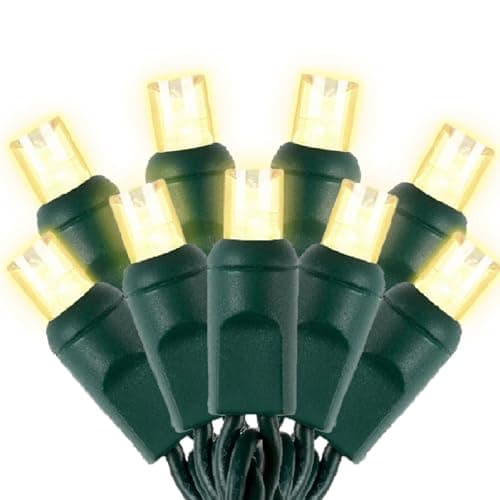
Warm White LED 50ft Commercial (Long Trunk Runs)
Fifty feet of 100-count warm-white LEDs on green wire, rated commercial grade with a 5mm wide-angle bulb, UL listing, and an IP65 waterproo…
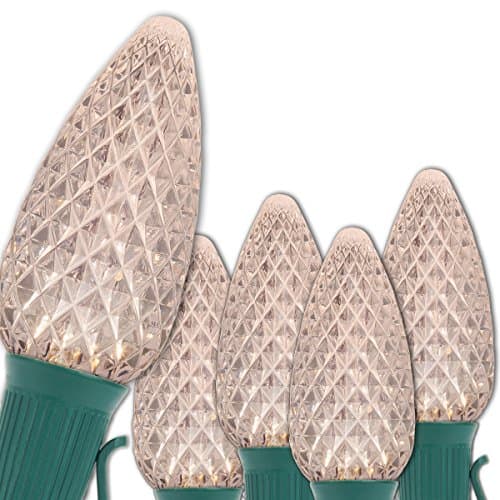
Wintergreen C9 OptiCore Commercial (Column & Railing Outline)
A 25-foot heavy-duty set of 25 warm-white C9 bulbs on green wire.
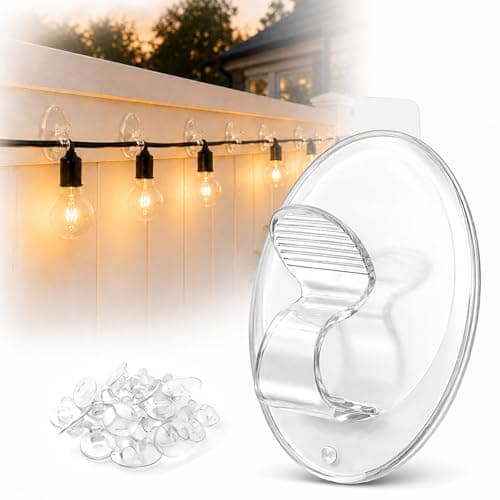
No-Drill Adhesive Light Clips (Smooth Column Anchoring)
A 20-piece pack of clear, heavy-duty, waterproof adhesive clips advertised with 3X stronger adhesion and no drilling.
| Trunk diameter | Wrap height | Spacing | Approx. footage |
|---|---|---|---|
| 6 in | 6 ft | 4 in (standard) | ~28 ft |
| 8 in | 6 ft | 4 in (standard) | ~38 ft |
| 12 in | 8 ft | 4 in (standard) | ~75 ft |
| 18 in | 8 ft | 4 in (standard) | ~113 ft |
| 12 in | 8 ft | 2 in (dense) | ~151 ft |
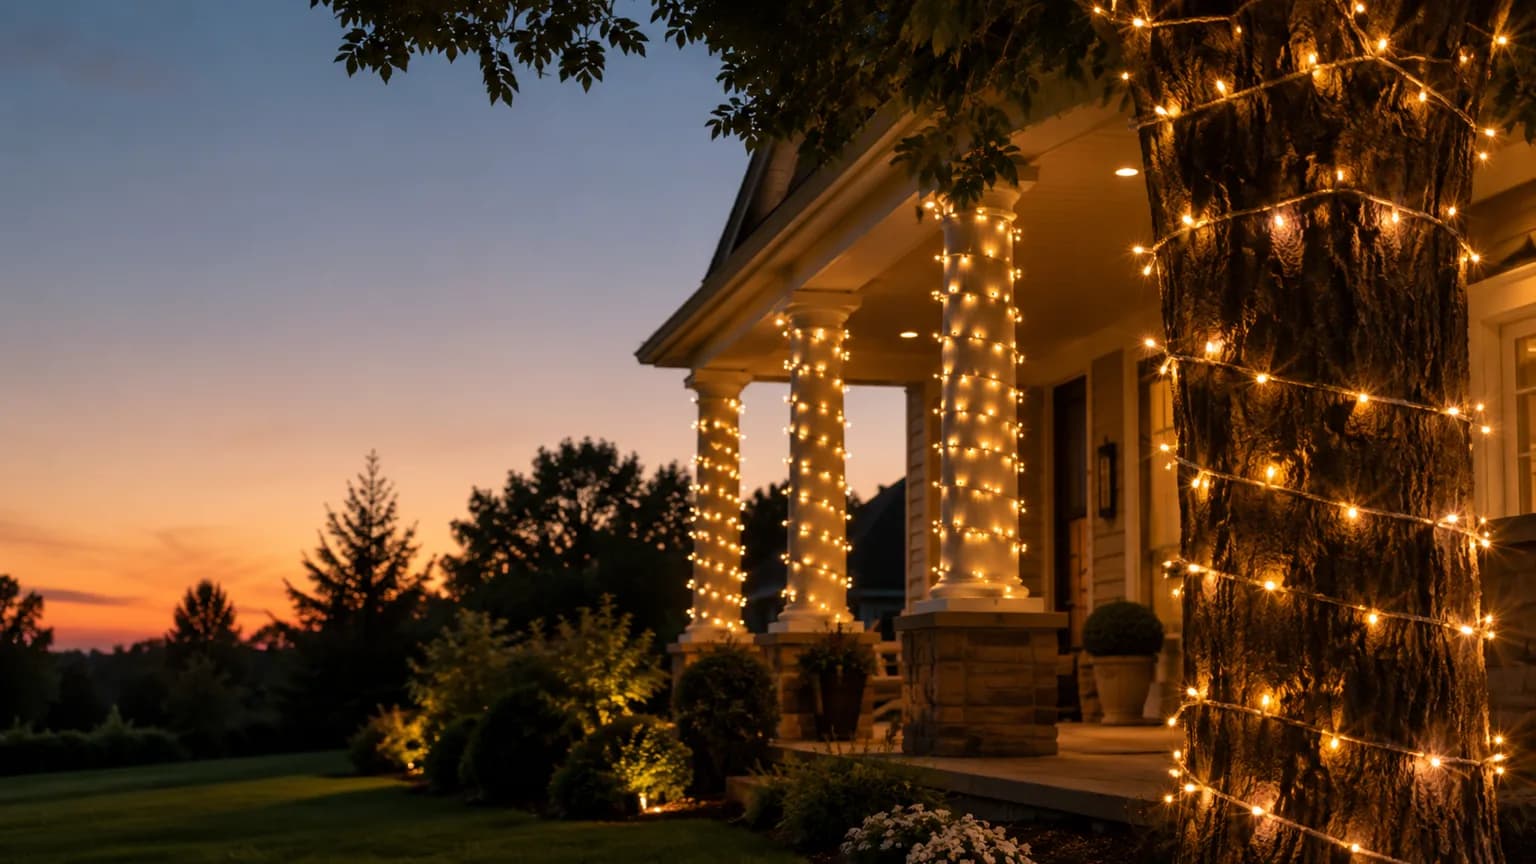
A lit trunk climbing into bare winter branches is one of the few holiday looks that reads as expensive from the street, and one of the few that a homeowner can pull off in an afternoon with nothing more than string lights and a plan. The catch is that "just wrap the tree" hides a real question underneath it: how much light does a given trunk actually swallow? Guess low and the strand runs out at chest height, leaving an awkward glowing stump. Guess high and there's a tangle of unused set coiled at the base.
The good news is that the footage isn't a mystery — it's arithmetic, and this guide lays out the exact formula plus a worked-example table for common trunk sizes, so the shopping list is settled before a single clip comes out. The same math and technique carry straight over to porch columns and railing runs, which is why they share this guide: a column is just a trunk that happens to be square and standing still.
Mid-summer is a genuinely good time to sort this out. Wrapping is slow, fiddly, standing-in-one-spot work, and doing it on a mild July evening beats fighting stiff, cold-brittle wire with numb fingers the weekend before the party. Buy the footage now while off-season pricing holds, do a dry run on the most visible tree, and the display is a plug-in away come December. For the whole-yard picture this fits into — zones, power routing, sequencing — start with the outdoor Christmas display planning guide.
How Much Light Does a Trunk Take? (The Formula)
Wrapping footage comes down to two numbers: how far the light travels around the trunk on each pass, and how many passes it takes to climb the height being lit. Multiply them and the total falls out.
Footage = trunk circumference (in feet) × number of wraps
Where:
- Circumference = π × diameter, or roughly 3.14 × the trunk's diameter. A 12-inch-thick trunk has a circumference of about 37.7 inches, or 3.14 feet.
- Number of wraps = wrap height ÷ spacing. Spacing is the vertical gap left between each loop as the strand spirals up. Tight, dense coverage runs 2–3 inches between passes; a standard, more economical look runs 4–6 inches.
Spacing is the single biggest lever on the total. Halving the gap doubles the number of wraps and therefore doubles the footage — a dense 2-inch wrap uses roughly twice the light of a standard 4-inch wrap on the identical trunk.
A worked example, using a medium trunk at standard spacing:
- Trunk diameter: 12 inches → circumference = 3.14 × 12 = 37.7 inches ≈ 3.14 feet
- Wrap height: 8 feet = 96 inches; spacing 4 inches → 96 ÷ 4 = 24 wraps
- Footage = 3.14 ft × 24 wraps = ~75 feet
That's the whole method. The table below runs it for common trunk sizes so the numbers can be read straight off.
Two things worth flagging before shopping off these figures. First, they cover the trunk only — wrapping a few main branches adds more, covered further down. Second, buy a little over the estimate, not under: a strand pulled bar-tight to stretch the last foot strains the wire and looks sparse. For a full-house tally that folds trunks, roofline, and shrubs into one number, the how many Christmas lights do I need calculator is the companion piece to this section.
What to Buy
Three items cover almost every tree, column, and railing job. Long trunk and branch runs want a lot of continuous footage on a single durable set; a bold column or railing outline wants larger, evenly spaced bulbs; and smooth column faces want something to anchor the strand to when there's no branch or corner to hook.
Warm White LED 50ft Commercial (Long Trunk Runs) ASIN: B0D3G1CHN5 | Price: ~$25.99 Check price

Fifty feet of 100-count warm-white LEDs on green wire, rated commercial grade with a 5mm wide-angle bulb, UL listing, and an IP65 waterproof rating per its title. The long single run is the reason to reach for it on trunks: one set covers a mid-size trunk with fewer strand-to-strand junctions to seat and weatherproof. The green wire disappears against bark by day. Trade-off: 50 feet is a lot of set to feed around a trunk one loop at a time, so it rewards patience over a fast job, and the wide-angle 5mm bulb throws a softer point of light than a large C9 — intentional on a trunk, less punchy if a bold outline is the goal.
Wintergreen C9 OptiCore Commercial (Column & Railing Outline) ASIN: B076JGBDPD | Price: ~$49.99 Check price

A 25-foot heavy-duty set of 25 warm-white C9 bulbs on green wire. The larger C9 bulb is the classic bold-outline look — spaced along a railing cap or spiraled up a column, it reads as distinct points of light rather than a continuous glow, which suits architectural lines better than a fine strand. The honest limits: at one bulb per foot it's a low-density set built for outlining edges, not for densely packing a trunk, and at ~$50 for 25 feet it's the priciest option here per foot — worth it where the heavy bulb earns its keep, overkill for a run meant to blend.
No-Drill Adhesive Light Clips (Smooth Column Anchoring) ASIN: B0CG5BFCMC | Price: ~$12.99 Check price

A 20-piece pack of clear, heavy-duty, waterproof adhesive clips advertised with 3X stronger adhesion and no drilling. On a tree trunk the bark does the anchoring for free, but a smooth-faced porch column offers nothing to hook — these give the spiral a start-and-end point and hold the top row from creeping down. Trade-offs: adhesives bond best on a clean, dry, warm surface (another point for a summer install), and rough or flaking paint is exactly the surface they struggle to grip. Check the pack's own rating before loading a run onto just a few clips.
Anchoring at the Base
Every wrap job lives or dies on the first two feet. Start at the bottom of the trunk, not the top — gravity works with a wrap that begins low and climbs, and against one that starts high and sags. Leave the plug end at the base nearest the power source so the connection lands where the cord will meet it, rather than stranded up in the branches.
- Tie off, don't just start looping. Loop the strand around the trunk two or three times at the base with each pass sitting tight against the last, then tuck the plug end under those wraps. Those stacked base loops are the anchor the whole spiral hangs from.
- On a smooth column, use a clip. Bark grips a strand on its own; a painted or composite column doesn't. Seat an adhesive clip low on a clean, dry patch and start the run there so the bottom of the spiral can't slide.
- Leave the plug reachable. Keep the male plug end accessible at the base — it's what connects to the extension cord or the next set, and burying it under fifteen loops means unwrapping to reach it later.
A base that's anchored snug lets every wrap above it stay under gentle tension instead of relying on friction alone, which is what keeps the spiral even for the whole season instead of bunching after the first windy night.
Wrapping the Trunk: Up vs. Down
The most common question after footage is direction, and the practical answer is to wrap upward from the anchored base. Climbing lets each new loop rest on the one below and hold its own spacing, and it keeps the loose remaining coil in hand and moving away from the finished work rather than dragging across it.
Keep a few habits consistent all the way up:
- Hold the spacing by eye or by hand-width. Four fingers laid flat is roughly 3 inches — a quick, repeatable gauge for keeping the gap even without a tape measure. Consistent spacing is what separates a clean spiral from a look that wanders.
- Keep gentle, even tension. Snug against the bark, never cutting into it. A strand pulled too tight strains the wire and can bite into soft bark; too loose and it sags into gaps by December.
- Feed the coil, don't fight it. Work a manageable arm's length off the coil at a time rather than letting the whole set tangle. Wrapping is slow by nature — rushing the coil is how knots start.
- Plan the finish. As the strand nears its end, either tie off with a couple of tight loops the way the base was anchored, or carry the run straight up into the main branches if branch wrapping is part of the plan.
Wrapping downward isn't wrong, and it can be easier on a very tall trunk reached from a ladder up high, but it fights gravity the whole way and makes even spacing harder to hold — for most trunks, bottom-up wins.
Wrapping Branches (Main Limbs Only)
The instinct to light every twig is what turns a two-hour job into a two-day one and empties three extra sets in the process. Restraint reads better from the street.
- Main structural limbs only. Carry the strand out along the few largest branches and stop there. The eye fills in the shape; the fine outer twigs don't need tracing and won't hold a strand anyway.
- Wrap out and back on a single limb, or bridge from one main limb to the next where they fork close together — don't cut and restart at every branch.
- Ease the spacing on branches. Branches are thinner and more visible against the sky, so a slightly wider gap than the trunk keeps the footage sane and the look balanced.
- Budget the footage separately. A few main limbs can easily add another 20–40 feet on top of the trunk figure from the table above, so add a set to the estimate if branch wrapping is in the plan rather than borrowing from the trunk's allotment.
For a purely trunk-and-column display, skipping branches entirely is a perfectly finished look — the lit column of the trunk is the effect doing the work.
Columns & Railings: The Spiral Technique
Porch columns and railings use the same math as a trunk — circumference times wraps — but their straight, regular geometry actually makes an even result easier to hold than organic bark does.
Columns (spiral wrap):
- Anchor low with an adhesive clip on a clean, dry patch, exactly as with a smooth trunk.
- Spiral upward at a consistent angle — the trick to even rows on a straight column is keeping the diagonal of each pass matched, so the gap between loops reads uniform up the whole height.
- On a square column, let the strand cross each corner at the same point on every pass; ragged corners are the giveaway of a rushed column wrap.
- A bold C9 set spiraled up a column and a warm-white strand packed denser both work — the choice is between distinct points of light and a continuous glow.
Railings (run or wrap):
- A simple run laid along the top rail and clipped every couple of feet is the fastest railing look and plenty for most porches.
- For more presence, spiral each baluster or wrap the top and bottom rails together — same even-angle discipline as a column, just horizontal.
- Keep spacing matched to any column wrap on the same porch so the two read as one deliberate scheme rather than two separate jobs.
Even rows are almost entirely about consistent angle and consistent tension. Set both at the bottom, hold them all the way up, and the geometry does the rest.
Power Planning: Connecting Sets End-to-End
Wrapping a large trunk or a full porch usually means more than one set chained together, and that's where the electrical side needs a moment's thought before everything gets buried under loops.
- Respect the max-connection limit. Every string light has a maximum number of sets that can safely run end-to-end from a single plug — it's printed on the tag near the plug. LED sets like the commercial warm-white run above chain far more units than incandescent, but the limit is real; exceeding it overloads the first set's wiring. This is exactly the load math the Christmas light power, timers & safety planning guide lays out end to end.
- Start each run near the outlet. Anchoring the plug end at the base nearest the power source keeps the cord run short and avoids doubling extension cord back across the yard.
- Use outdoor-rated cord and a GFCI outlet. Any exterior run should plug into a GFCI-protected outlet, and every strand-to-cord junction should sit up off the ground with a drip loop so water runs off the low point instead of into the plug. Keep an outdoor-rated (SJTW-marked) extension cord on hand sized to the run.
- Put it on a timer. An outdoor-rated timer or smart plug turns a wrapped tree on and off automatically — cheap insurance against a display that gets left dark because no one wanted to crouch at the base every night.
Match the bulb technology to the plan, too. Whether a run is warm white, multicolor, mini, or C9 changes both the look and the draw — the Christmas light types explained buying guide breaks down which suits a trunk versus an architectural outline.
Takedown-Friendly Wrapping
The reason people leave last year's lights strangling a tree until March is that unwrapping a tightly spiraled set is miserable — unless the wrap was done with takedown in mind.
- Don't cinch the wraps into the bark. Snug, not buried. A strand that sits on the surface unwinds; one pulled into the bark or knotted at every branch has to be fought loose.
- Unwrap in reverse, top-down. Take the last loop off first and work back to the base, coiling the strand into a wide loop as it comes off rather than a tight ball that kinks the wire.
- Store loosely and dry. A wide, loose coil in a dry bin away from moisture and rodents keeps a set usable for years; a tight tangle stuffed in a box is next season's headache.
- Skip the twig-level detail — sticking to main limbs, as above, isn't just a look decision, it's what makes the whole thing come off in minutes instead of an afternoon.
One honest note: even a takedown-friendly wrap is an annual up-and-down chore. Leaving standard string lights on a living tree year-round isn't recommended — a growing trunk can slowly girdle against a tight strand, and a full season of summer sun degrades wire not built to sit out twelve months. For a genuinely install-once outdoor look, that's the argument for permanent architectural systems on the house itself rather than a wrapped tree. But for the tree, plan on the two-trip-a-year rhythm and make the wrap easy to reverse.
For the roofline half of the same display, how to hang Christmas lights on a roof & gutters is the sibling technique guide covering clips and ladder safety.
Last updated: July 2026. Prices and availability may vary on Amazon — check current details via the links above.
Frequently Asked Questions
How many lights do I need for a 6-foot tree trunk?
A small ornamental tree around 6 feet tall usually has a trunk of roughly 4–6 inches in diameter. Wrapping it at standard 4-inch spacing to about 5–6 feet of height works out to roughly 15–30 feet of light — one 50-foot commercial set covers it comfortably with room to carry into a couple of main branches. Drop to dense 2-inch spacing and that same trunk wants closer to double the footage. Run the numbers for the exact trunk using the formula and table above rather than guessing.
Should I wrap lights up or down the tree?
Upward, from an anchored base, for almost every trunk. Climbing lets each loop rest on the one below to hold its spacing and keeps the loose coil moving away from finished work instead of dragging across it. Downward wrapping fights gravity and makes even spacing harder to maintain — it's only worth considering on a very tall trunk being worked from the top down off a ladder.
Can I leave string lights on my outdoor trees year-round?
It's not recommended for a living tree. A growing trunk and limbs can slowly constrict against a tightly wrapped strand over months, and standard string lights aren't built to withstand a full year of summer UV and heat on top of winter. Take them down at season's end, or if a permanent lit look is the goal, mount an architectural system on the house rather than committing string lights to the tree.
What's the difference between dense and standard wrap spacing?
Spacing is the vertical gap left between each loop of the spiral. Dense (2–3 inches) gives near-solid coverage and a rich, packed glow but uses roughly twice the footage. Standard (4–6 inches) leaves visible bark or column between loops for a lighter, more economical look. The choice directly drives the shopping list — halving the spacing doubles the number of wraps and therefore the feet of light needed.
How do I keep extension cords and connections safe on a wrapped tree?
Plug into a GFCI-protected outdoor outlet, use only outdoor-rated (SJTW-marked) extension cord, and keep every plug-to-plug junction up off the wet ground with a drip loop so water sheds off the low point instead of tracking into the connection. Don't exceed the printed max-connection limit for sets chained end-to-end. The power, timers, and safety planning guide covers load math and weatherproofing in full.
When should I put lights up on outdoor trees?
Mild, dry weather makes the whole job easier and safer — wrapping is slow, hands-on work that's far more pleasant on a July or early-autumn evening than in December cold, when wire turns stiff and adhesive clips won't bond. Installing during a warm dry stretch also lets the strands and any clips seat properly before winter, so the plan here is to wrap early and simply plug in when the season arrives.
Get our Christmas gear picks
Holiday deal roundups and updates when our top picks change.
No spam, ever. Unsubscribe anytime.
Sources & Methodology
Methodology: ChristmasGearHQ guides are researched on an expert-verification model. Specifications, dimensions and capability claims are taken from the manufacturer's own published material and, where available, independent published reviews, and are attributed in the text to the source that published them. Where two sources disagree, we say so and name both rather than picking one. We do not make first-person hands-on testing claims.
Prices, sellers and availability are read from the live product page and move on their own schedule — confirm the current figure through the links above before buying. Edited by Nicholas Miles, Chief Editor. Corrections: contact us.
More Guides
- Christmas LightsBest Giant Lighted Outdoor Christmas Trees 2026: 6 to 20 Foot Cone, Flagpole, Spiral and 3D Picks
- Christmas LightsJellyfish vs Trimlight vs Gemstone - What Permanent Christmas Lights Cost in 2026
- Christmas LightsBest Smart Outdoor Plugs & Timer Zone Kits for Christmas Lights 2026
- Christmas LightsChristmas Light Power, Mounting & Cable Accessories 2026